Hi there!
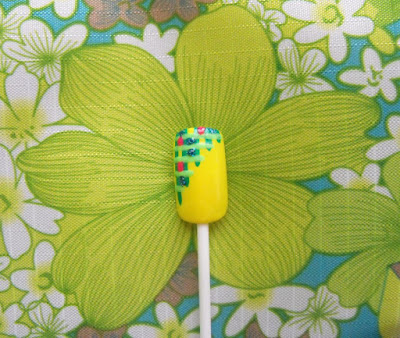
Today I wanna show you guys one very easy and beautiful design. You can match it to your outfit by using the colors you chose.
Lines
Advise: the design is super easy and depending on the dry-speed of your product it may also be very fast. Have fun!
Step by Step Tutorial
Products:
- Nail Polish for the background: yellow
- Nail Polishes for decoration: light green, dark green, cyclamen, clear with blue glitters
- To seal the design: Top Coat
- Additional tools: thin brush from a decoration nail polish, cotton pad, napkin
Materials
Design:
1. Choose one bright nail polish and apply it to all your nails.
2. Choose two polishes of same color, but different shade to make the lines. I choose light and dark green. Create vertical and horizontal lines, so that each new one is shorter than the previous. If you want to make your nails to optically seem longer, make the vertical lines darker and the horizontal ones – lighter.
3. Fill randomly some of the formed squares with two other colors of your choice. Wait for the design to dry.
4. Apply a top coat finish.
DONE!
Try the design out when using your favorite colors :)
Be safe and till next time!


No comments:
Post a Comment