Hi everyone!
Today’s design includes work with acrylic paints and one stroke technique again and it is a very interesting way to create unusual French manicure. The sideswipe over the tips of your nails is actually a butterfly :)

French Butterfly-2
Advice: This design is very beautiful, unusual and delicate. The time you need to make it depends on whether you’ll use it on each nail, or on some nails. The acrylic paints we’re going to use dry very fast and make your work easier. If your mess up your drawing, just up clean with a wet ear stick and repeat the steps. Have fun!
Step by Step Tutorial
Products:
- Nail Polish for the background: white
- Acrylic Paints for the decoration: black, white, yellow, light blue
- To seal the design: Top Coat
- Additional tools: flat brush (size 4), thin nail art brush (9mm), palette (I’m using a fake CD instead), glass of water, napkin

Products
Design:
1. Polish all nails with white (or another light color) and let them dry.

2. Using the white acrylic paint and a thin nail art brush, make one diagonal sideline to from the smile line of your French tip. This line will act as a guide to know where to draw your butterfly. Again – it’s always better to first draw your motive on a piece of paper to have a better view of your design.


3. Dip one side of your flat brush in white and the other one in blue acrylic paint. Of course, you can combine other colors of your choice. Always dry your brush in a napkin in order not to make the paints too wet. Paint two small butterfly wings – the first one you’ll make with 3 and the second one with 4 strokes.

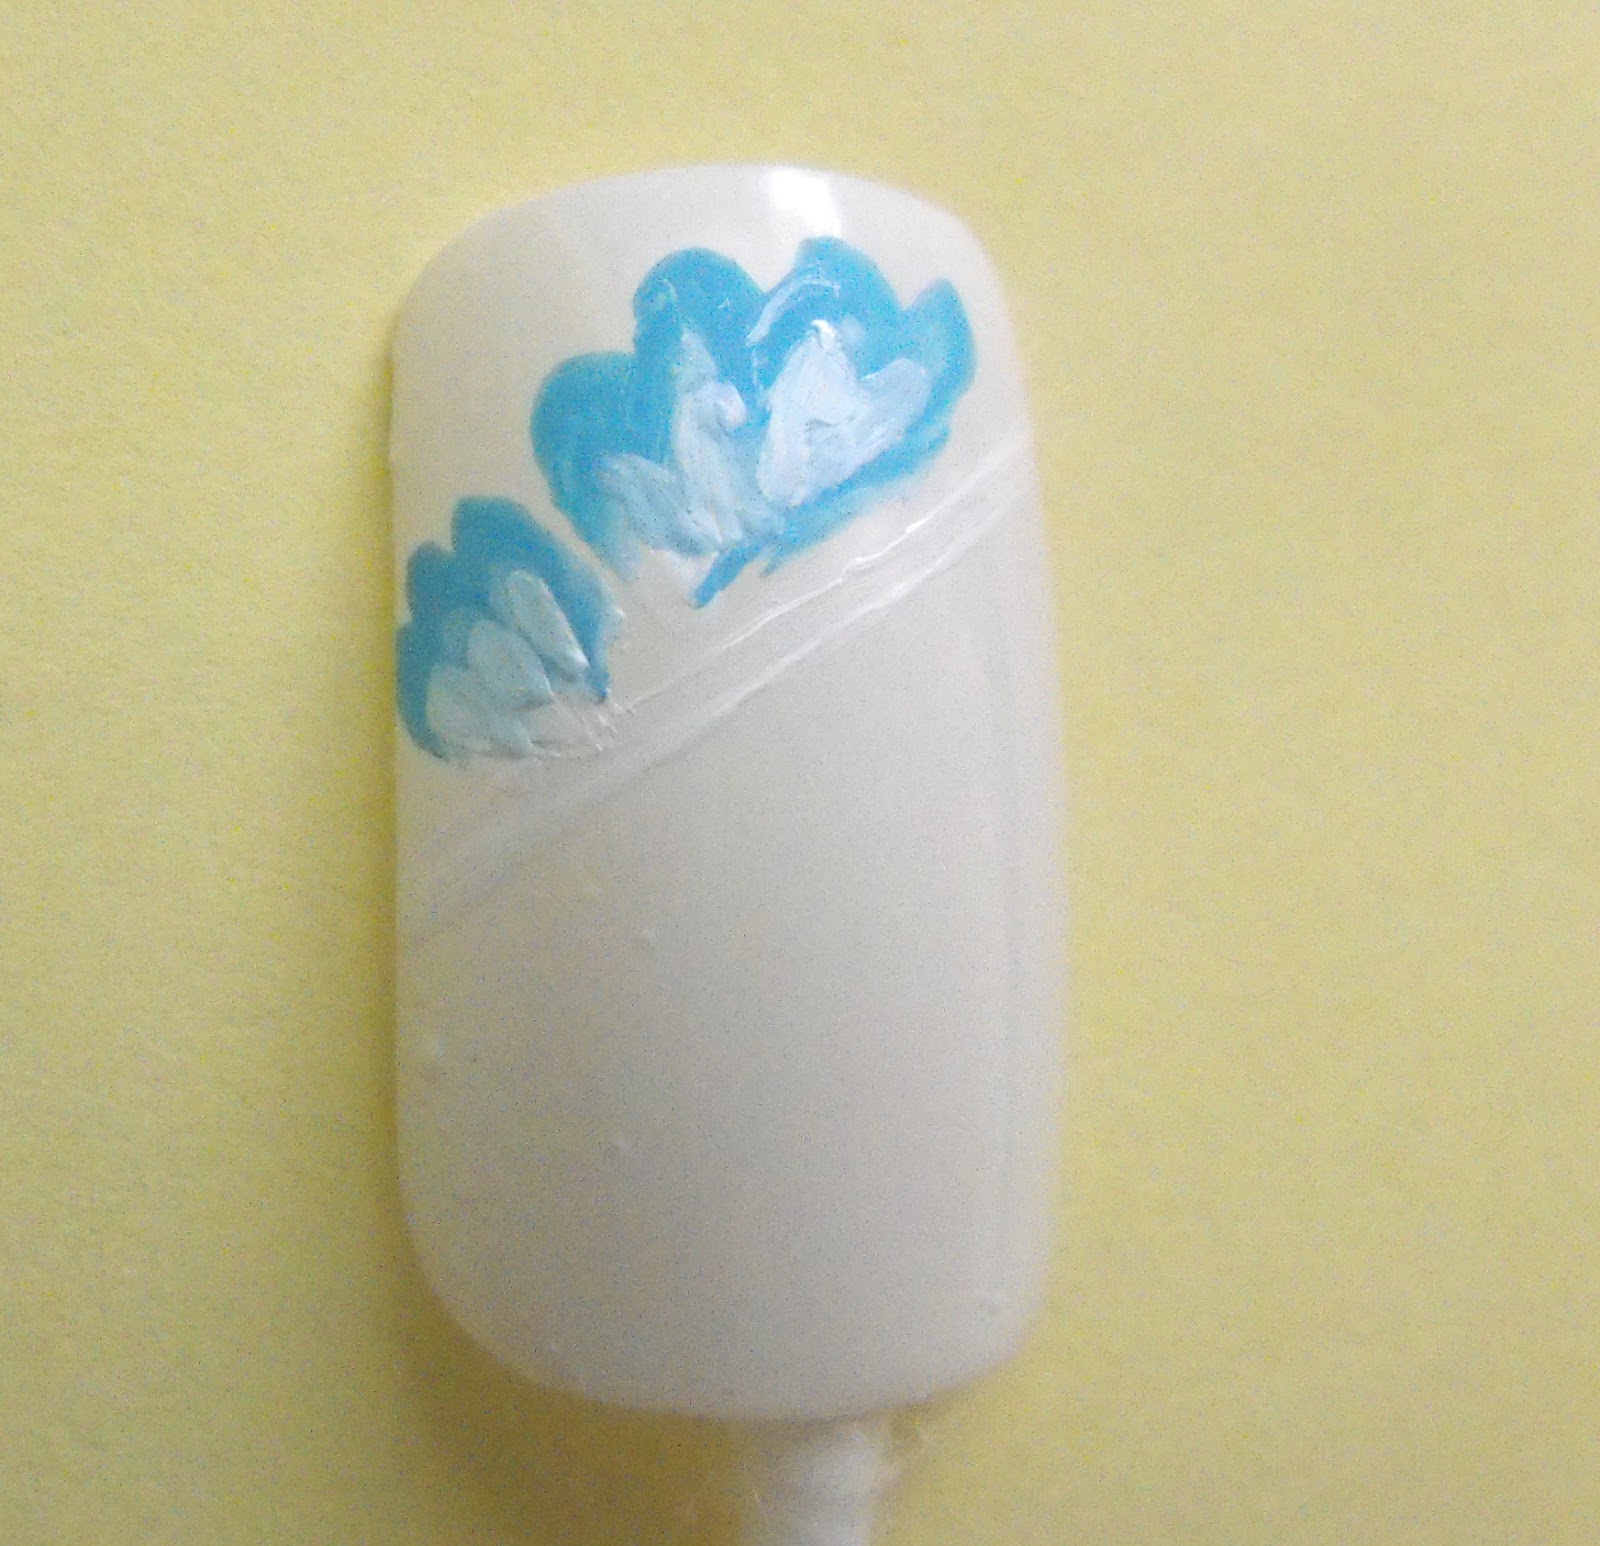
4. Outline the wings with black paint using the thin nail art brush.


5. Make thin black lines in the bottom part of the wings and small dots in the upper ones.


6. Draw the body of the butterfly starting with a big dot for the head, continuing to make smaller dots to build the body and finishing with two small antennas.


7. For an accent, make thin lines between the black lines in the wings. Make a tiny dot as an eye.

8. Make small dots on the white tip areas of your nails using the same color you used for the upper part of the wings (in my case it’s a light blue paint). If you want to you can add additional motives in the left white areas. Don’t forget to experiment freely, as the acrylic paints are easy washable with clear water.


9. Apply a top coat! This is very important, because the acrylic paints are water dissolvable. When you’re finished don’t forget to wash the remaining paints with water off of your palette.
DONE!
Wish you luck and great artistic mood :)
Greetings!
P.S. Inspired by love4nails
No comments:
Post a Comment